Movement in your Moov: Filters and Motion Settings
|
Filters Even though you are using still images to build and tell your story, the use of the Image Pan filter can create the illusion of camera movement. |
|
|
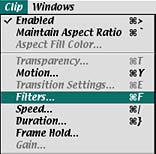
Apply a filter to a selected clip Once you have selected a clip in the Timeline, Choose Filters… from the Clip menu.
|
The Filters window has a scrolling list on the left to choose from. Most of the filters behave as they do in Photoshop, others work to change a clip's appearance over time. Click the Add button each time you choose from the list. More than one filter can be applied to a clip. Click OK and drag your cursor across the Timeline ruler to see the results. |
|
Panning an Image The Image Pan filter can create the illusion of camera movement; zooming or panning over an image. The dialog window displays a Start image, an End image and a Preview window to reflect and animate your changes. Hold down the Shift key to change the frame size proportionally and define the area of focus by dragging the box handles. This will create a zoom effect from the beginning point of the clip to the end. Once you have perfected your zoom, a copy can be generated to create a continuous zoom in the opposite direction. Edit these Filter settings further, Exchange the sized frames, make adjustments to the size of the End image and let it follow the original in the timeline. Drag your cursor across the Timeline ruler to see the results. |
|
|
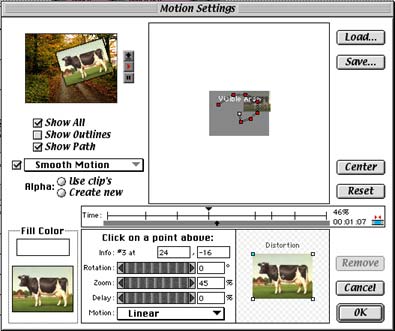
Motion Settings |
|
|
Motion settings You can accomplish the zoom or pan effect in an alternate way, choosing Motion… (from the Clip menu), however this clip effect offers even more manipulation of your image. The dialog window lets you create a path with clicks to create points. These points can be moved with the arrows keys for finer adjustment. At each of these points in time you can adjust the size, the rotation, and the shape of the image. The animated preview will reflect your changes and can be paused while you make adjustments. Shrinking the image will show the outer edge of its frame, making it appear to float over another video track. Placing the image clip in the Superimpose track will give the impression it is floating over both video tracks and their transitions. |
 |
|
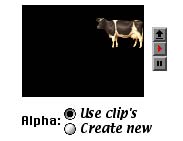
Use your selection skills in Photoshop to prepare an appropriate image with an area of transparency to cut it out of its background. This is called an Alpha channel in a Premiere project. Save the image as
a PICT file with a resolution of 32 bits/pixel and no compression Import this saved image into your Project and add to either video or superimpose tracks. |
Importing an image clip with a transparent background makes it appear to fly or float as an object and not as a picture of an object when the Alpha channel is utilized in the Motion settings . 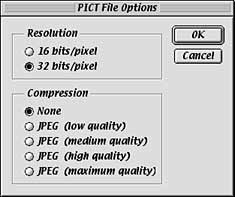 |
|
|
|
.